The Hubsan H501S X4 is a brushless Remote Controlled Quadcopter, which has a very high Value for Money! We're talking $200 price range here, and features you would only expect to find on a copter that costs more like twice that!

I got this one very kindly sent to me by GearBest for review, and that is what you are about to read about, here!

The X4, as I will call it for short from here on, comes in an impressively compact box for an RTF (Ready to Fly) quadcopter of this size. The controller looks very professional, and "feels" like a quality build too.

Inside the box, there are two separate compartments: one for the controller, and one for the quad itself, plus two boxes with the accessories inside.

There's a charger, 2 sets of props, a tool, the controller, and an extra little baggy (more on that one later)

The flight battery is already placed inside the battery compartment of the drone.
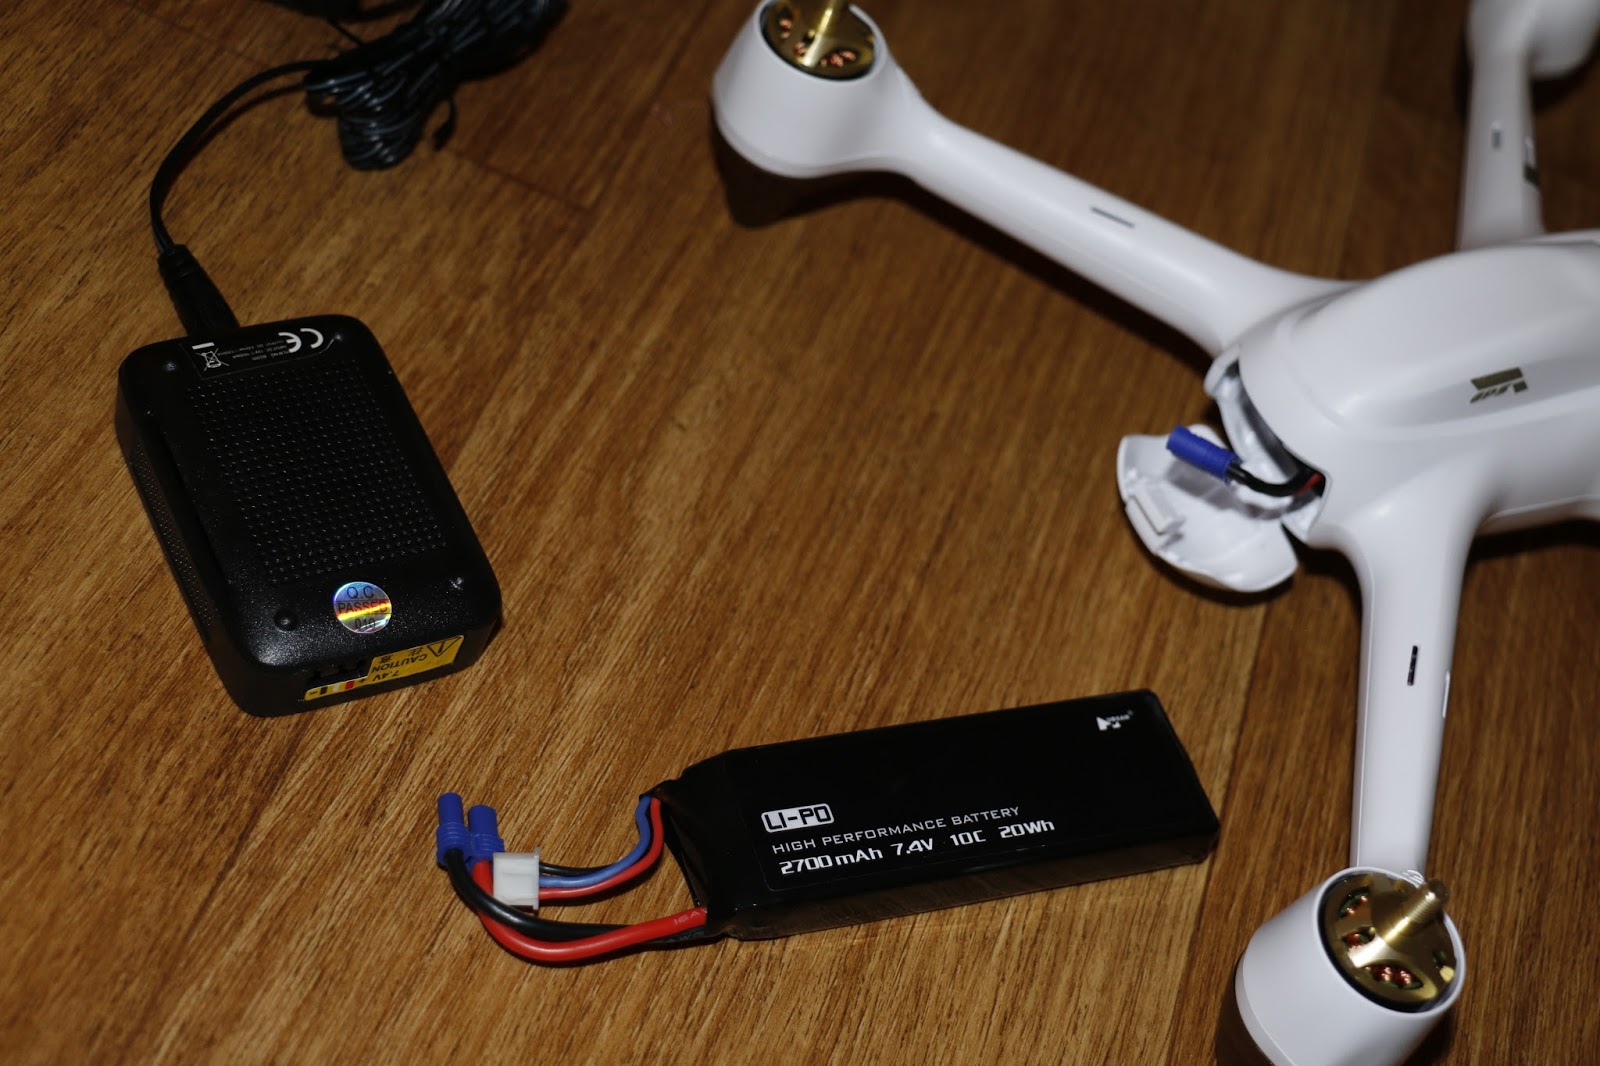
It's a 2700 mAh 2S battery, with an EC-3 connector. It can be charged with the supplied balance charger through the balance lead.

The tool is meant to hold the motors when mounting or removing the props. The motors have clockwise and counterclockwise threads, to make them self-locking. As you can see, the arms are marked with letters A or B, and so are the corresponding propellers.

The little baggy contains an ND filter, to put in front of the camera when filming in very light light conditions, such as on snowy hills. A nice touch! That way, the snow will not blow out the rest of the image!

The small disc inside it's bag :)

Inside the battery compartment, there is a micro-USB connection, for updating the firmware, if needed. I did not do that, because I first wanted to see how it behaved "out-of-the-box", but it is a nice feature!

One of the accessories is a click-on foldable sunshade for the controller screen, which I immediately installed.

The controller takes 8 (!) AA batteries, which are not supplied - so you'll have to source them yourself. I did not have that many laying around, so I had to go out and buy me a pack.
The battery block is connected to the main board through a JST connector, so powering from a 3S LiPo with JST could be an option to avoid having to keep 8 AAs in stock.
Power Up
After putting the battery pack fully loaded into the controller, and switching it on, the X4 itself can be turned on. After a couple of seconds, the transmitter will dislay its GPS position on the screen, together with some other transmitter-related infomation (like the battery staus). Unless, of course if you fire it up indoors, where GPS satelite reception can be very poor.
Safety tip: It's always a good idea to get yourself used to that order - controller on first, quad after that - beacuse if for some reason the propellers start turing already, you immediately have something to try and control the quad with. And when firing up a quad for the very first time: always do so with the props removed!
The X4 has some safety features in place to prevent "spontaneous arming" of the quad, but just to make sure these safety features actually work, first start-up should always be without props, and with the transmitter switched on.
Once you connect the EC-2 connector of the flight battery to the main board, the beast comes alive. Fumbling the connector and the leads back into the rear hatch of the craft can be a hassle at first, but you'll soon get the hang of it. Before you can fly, it needs to locate enough GPS satelites to get an accurate enough fix. This only took some 15 to 20 seconds on my first power up, and that was indoors under a metal roof! I find that a very impressive performance of this GPS unit. Later on, I noticed that merely holding my hand above the fuselage would decrease the number of satelites seen, so the system is somewhat sensitive to blocking the view towards the sky. Or maybe that's just becuse it has not yet found all the satelites in the sky in this half of the world just yet... A so-called "cold start" os a GPS receiver always takes longer to obtain a reliable fix, because the position of "last seen" satelites is not available.
Without a solid GPS fix, it is impossible to start the motors in any GPS assisted flight mode. These are all modes, except for "Acro" mode, but that's probably not the flight mode you want to deliberately start with. It is also hidden deep in the menu structure, just to make sure any beginners don't accidentally disable GPS, and fly in Acro mode. See the manual if you DO want to go crazy, and do flips and rolls, and such.
The calibration of both the accelerometers and the compass are done by rotating the quad in the horizontal plane, "right side up", and "nose down". Only a few turns are needed, and you're good to go.
The X4 weighs less than half a kilo in its full flight configuration.

That makes it easy to carry around, and makes that it has less kinetic energy in case you acicidentally hit something. It also makes it having to work harder to ocombat the wind, when trying to stay in one position.
First Flight
I took the X4 out for a maiden flight on a rather windy day, in between rain showers. I estimate the wind to be around 4 to 5 Beaufort, which is pretty steep for such a light craft. But al least it was dry for a change. The sun even came out that very moment!
I had planned to do two sessions. One just to get myself a good first impression, and after recharging the batteries, I would go out and do the flight that was going to be the actual review flight. In between, I would then have the time, while the battery was charging, to review the raw footage, and decide what I would need to do differently for the final review flight.
But when I got back in after the flight, it started raining again. And it never stopped since! Or at least not at any time I had the opportunity to fly.
So there are some things I normally would have done differently in this little video, but I just never got the chance to do it over again.
I really did enjoy flying this X4! So there will be more footage in the future. But I did not want to wait until spring to release this video and this review.
Something this X4 has over many other "GPS quadcopters": The FPV footage can be seen (also by bystanders) on the screen of the controller. But as it is a regular 5.8 GHz, you can also put it up on a screen or goggles. And of course the DVR inside the X4 will record all that footage for you in 1080P MP4 format. Just stick a micro SD card in the bottom side of the X4, and you're good to go.

You can then record video, or take still pictures, with a button on the controller.
Pros and Cons
Pros
- quality build, both quad and controller
- Good quality video footage
- Gentle flyer; well controllable
- GPS functionalities
- FPV is regular 5.8 GHz FPV
- Lightweight (easy to transport; less collision damage)
Cons
- 8 AA batteries needed for controller (not supplied)
- Light (wind sensitive)
- No gimbal or other image stabilisation
You can get this Hubsan H501S X4 Advanced on GearBest:
Hubsan H501S X4 Advanced - White EU version
Thanks for sharing such a marvelous piece of article but I want to share review of another impressive 2022 Hubsan ACE SE Drone that you will find very informative.
ReplyDelete