The GearBest GB X155 Kit is, of course, available through GearBest.
This nicely priced kit includes a video camera, transmitter, and goggles too! So it is aimed at first-time FPV pilots, like myself. Let's see how a target group member copes with assembling all these bits and bobs into a flying machine...
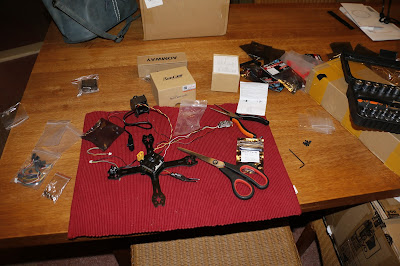
What you get is a big box with little bags of parts, and a couple of smaller boxes for the Runcam camers, the Aomway antenna, and a bigger box with the FPV goggles.

Let's start with the motors, because they are one of the major performance components. In this kit, you will find 4 Emax 1306, 4000KV RS series motors. Thay produce a little more torque than the 6000-7000 KV tiny motors that are out there, so they can handle three-bladed props with slightly higer pitch.

The props that come with the kit are 3035 three-bladed bull nose props with no particular brand on it. I ordered some Gemfan replacements for them, for when I crash (it's not IF, but WHEN ;) )

The ESCs are 10 DYS BLHeli S ESCs, capable of Dshot300 at least. Allthough they are labeled "oneshot 128", they were configured for DShot300 by default in the Flight Controller firmware.
The ESCs are rated 1S to 3S, and are therewith the liniting factor for as far as battery voltage goes. 3S is quite enough, so no worries there.


The Video Transmitter (VTX) is a 48 channel, 25 - 600 mW switchable version without any brand name on it. It can be fed directly from a 2 to 6 S battery, so that will be quite enough range there. It has a little 8-segment display to shoe the current band and channel, and shows the transmission power setting when the button next to it is pressed.

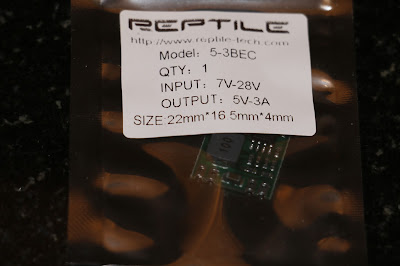
There's a 5V, 3A BEC included, so you can power the camera, VTX, and the Flight controller with a regulated 5V power supply. Again 2S to 6S rated, so plenty of margin there.

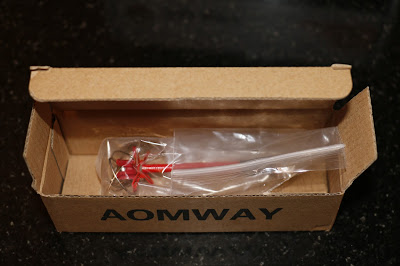
The video transmission antenna is a proper Aomway circular polarised "clover leaf" antenna, wich should do well in the field.
The camera is an actual Runcam Swift. That's an 800 TV-lines CCD camera, with a 2.8mm lens attached to it. I am a little bit concerned about the view angle of a 2.8mm lens (I think it will be a bit narrow), but there are replacement lenses available with shorter focal lengths. So I will first see what this out-of-the box setup does.

In order to see the picture, Goggles are included in this kit. My first impression when I opened the box is that of a cheap pair of goggles, but let's not judge right away. It comes with a separate battery (nice that it is included!), and a charger for the battery.

The battery goes into a pouch at the rear of the headband, so it's weight does not count with the weight pushing on your nose. Which is a good thing, because these goggles are nicely light because of it! Not entirely sure about the "whip" antenna that comes with it, but again, let's not judge before I have even powered it on yet.

As for "the stack": the Power distribution board goes on the bottom position, held away from the (conductive!) carbon fibre frame palate by spacers. The flightcontroller goes on top of the PDB, followed by the base plate for the camera "pod" - all separated by spacers.

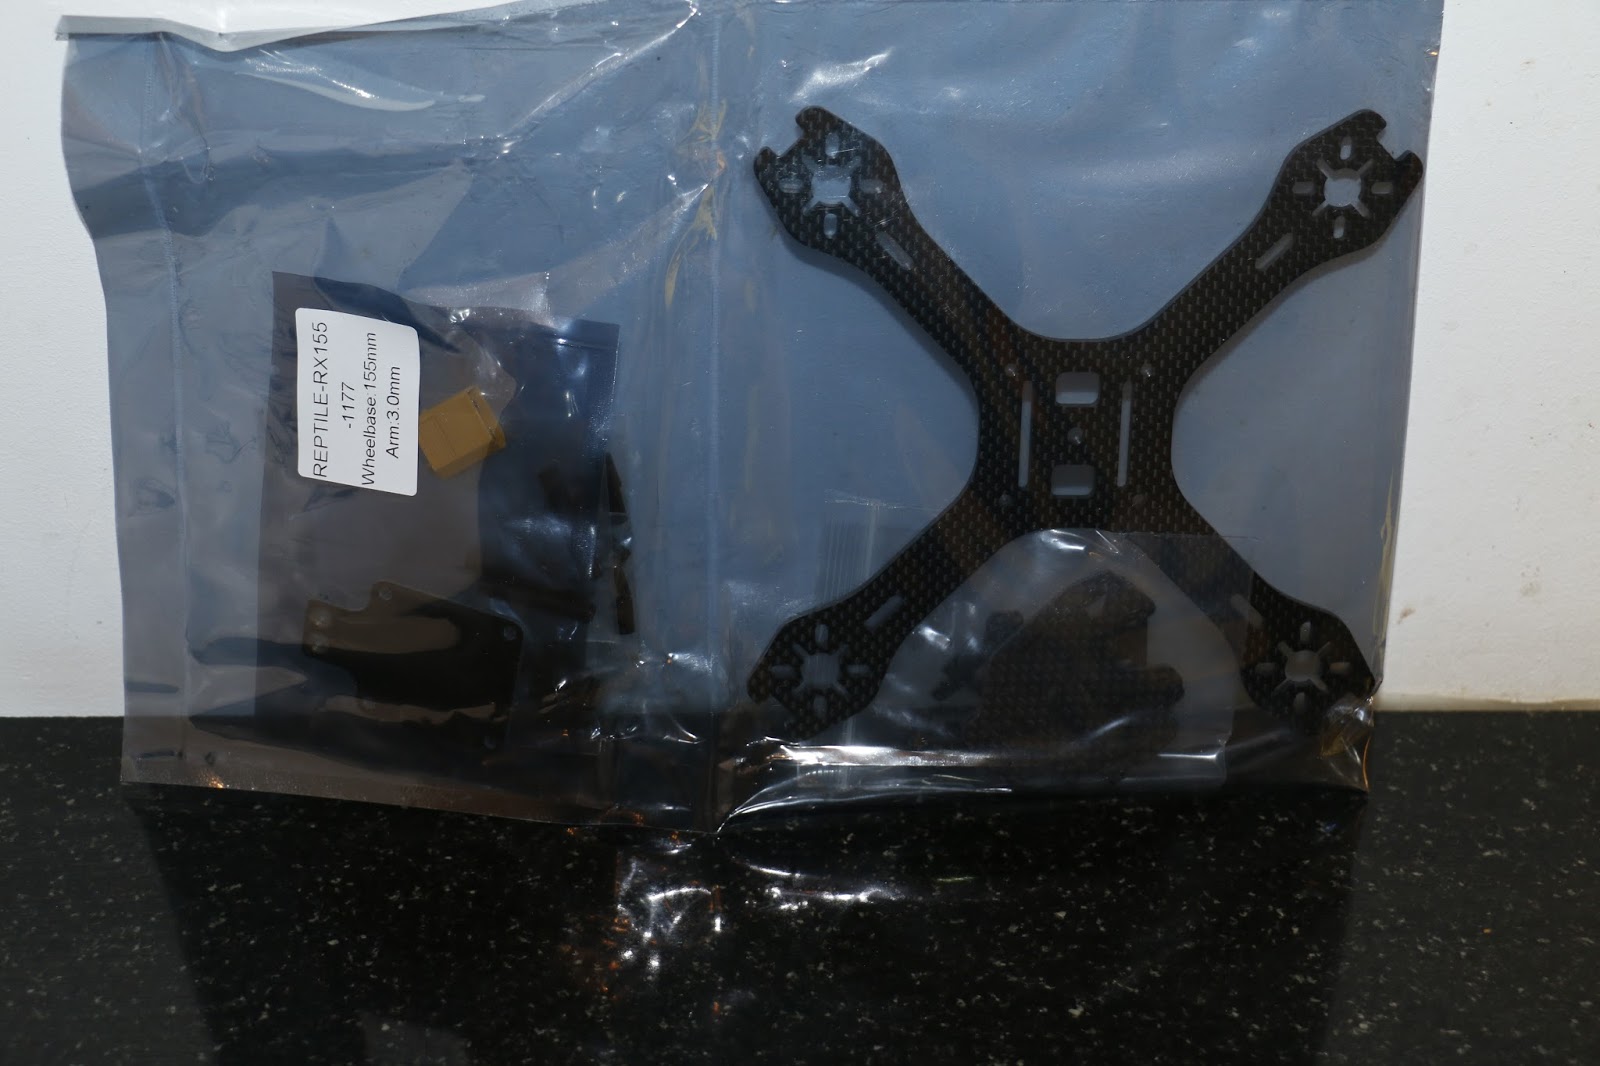
It looks like the frame was originally designed for bigger motors. There's plenty of space around the motors (which will act as protection in case of a vrash, so that's no problem), but the attachment screws are only just slotted into the arms. That means the screws have only minimal contact surface with the frame.
OK, time to mess with wires! :)

I will solder the motors directly on to the ESCs. Since they are BLHeli ESCs, there's no need for bullet connectors or such. If the direction of rotation is reversed to whet you want, you can corect that in the BLHeli software.

To de-solder the three wires from the ESCs, I cut the shrink-tube at the two edges, and folded it back on the soldering side. After cutting the motor wires to the correct length, stripping, and tinning them, they could be soldered on to the three pads on the ESC. A little new shrink-tube, and all is done, neat and tidy!

It takes a little careful reading and figuring out what goes where on the flight controller. In the end, I removed all not-used wires from their connectors. If you do that carefully, they can be placed back later, if you decide you need them after all (for a LED strip, maybe?)

The ESC power lines go to the power distribution board. I used two pads on the PDB to solder the 5V BEC on to. The 5V side of the BEC powers both the Flight Controller, as well as the VTX (and therewith the camera). The idea is that the BEC also serves as a filter to prevent noise from the ESC power lines to reac the VTX. We'll see how that works. If it is not good enough, I can always add a capacitor.

I stuck the BEC, together with the receiver, in between the PDB, and the flight controller. I soldered the angled header pins on the Flight Controller, and used the ESC connectors to connect the ESCs. Maybe I will solder the (shortened) wires directly to the board in the future, but for now, I will first try them out as such.

There was no room to put the VTX inside the camera pod, so I zip-tied it to the back. That way, the LCD screen is visible, and the push button for selecting Band / Channel / Power is reachable.

A bit of a bugger: the side plates of the top pod sit directly above the screws that hold down the pod's bottom plate (or the stack's top plate). Which means you cannot reach those screws with the side plates in place. That, in turn means that the camera will fall out from in between the side plates when you spread the side plates far enough to reach the screws. In short: you need to treat that plate as the top plate of the stack, and only then start assembling the pod.

So, the mechanical end electrotechnical build themselves proved to be pretty straight-forward. It was just about what you'd expect from an X-frame, motors, 4 ESCs, PDB / FC/ BEC stack, plus video pod.
Now, the software bit held a somewhat of a surprise...
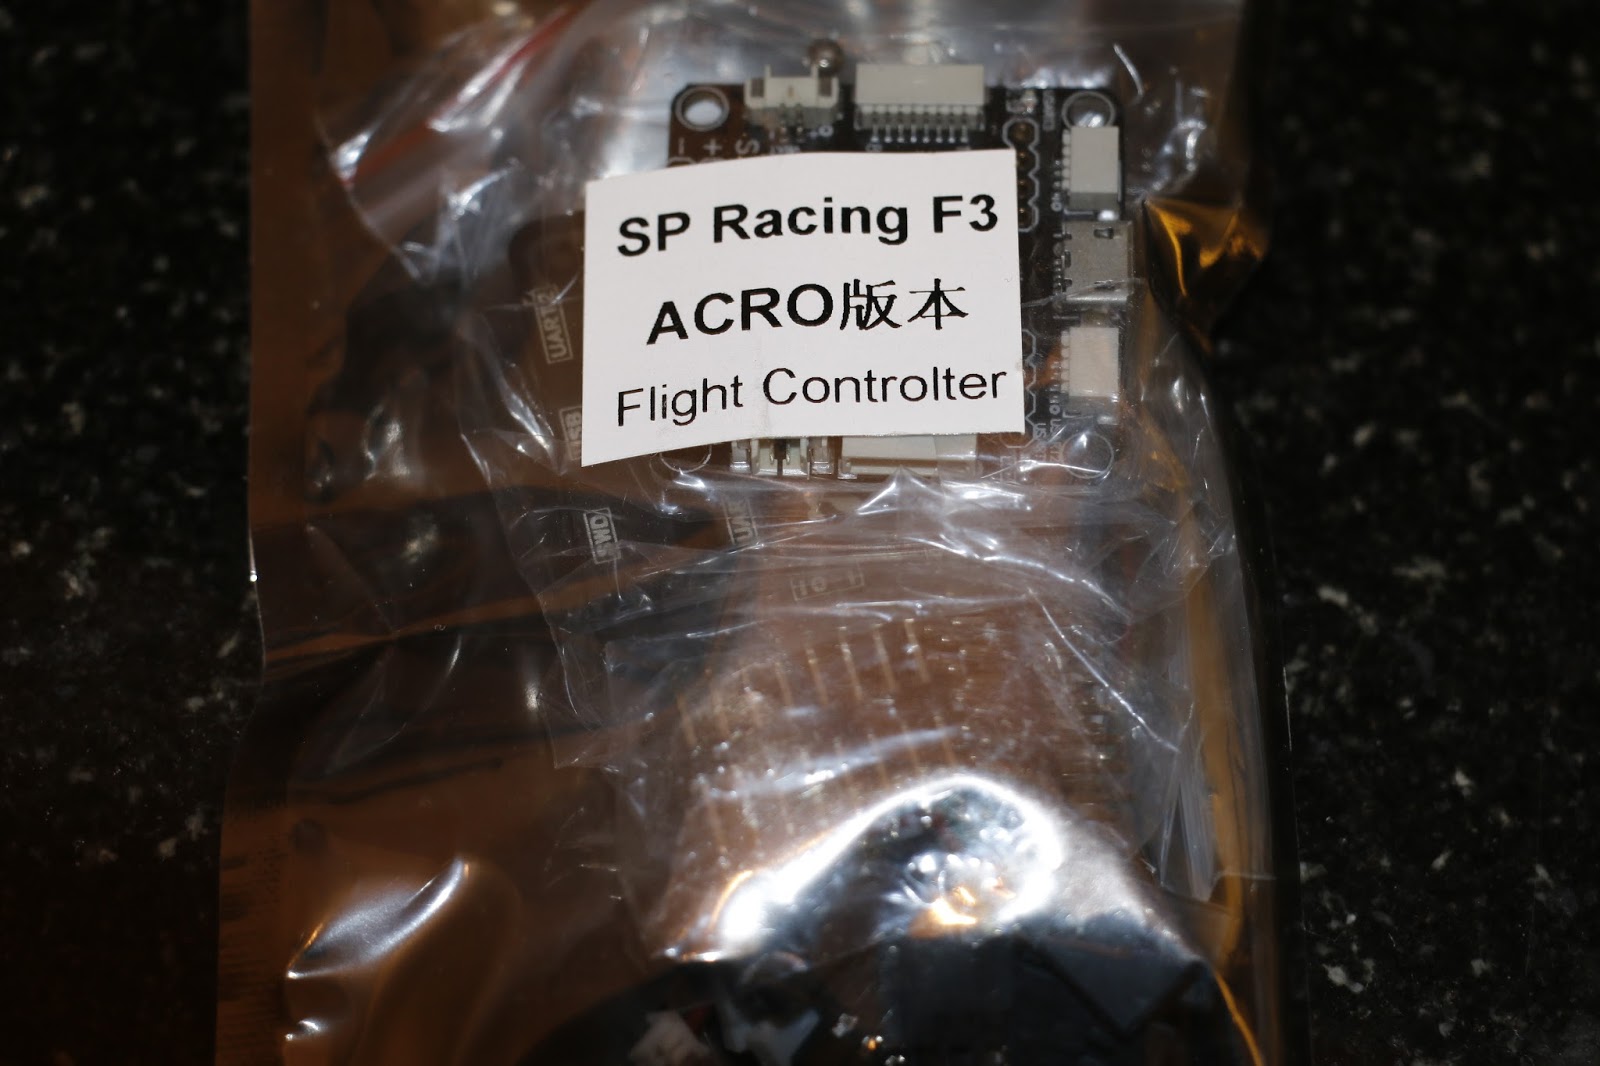
There's no instructions as to what firmware is on the board, nor how to flash it. When I connected to BetaFlight, I got an error message, stating that this was not the correct firmware. It turned out to be Cleanflight, flashed on to the board. No worries, I have another CleanFlight drone, so I have Cleanflight installed somewhere too...
But then CleanFlight came back with the message that the firmware on the device was too old for this version of Cleanflight...

The CLI (Command Line Interface) told me that the Flight Controller was flashed with CleanFlight 1.11, dated late 2015! Obviously, this Flight Controller came from a pile of "left overs". Then again, SPRacing F3 Flight controllers were the way to go, state-of-the-art, only two years ago. What I mean to say is that it will fly with this firmware.

The firmware can be upgraded, of course. And nowadays, an SPRacing F3 with up-to-date CleanFlight is still a pretty decent setup. But for now, I wanted to see how it performs out-of-the-box. So no firmware flashing just yet! It did mean, however, that I had to install an earlier version of CleanFlight next to the version 2.1.0 I already had installed. Lucky for me, tha tis possible!
Final item in the kit is the FPV goggles. They are not branded, and are called RG-007 on the box. They come with a single whip antenna. Since I already have the LS-800D Goggles that can split into two parts, one of which can function as a standalone screen. So I thought I'd put the two next to each other, and compare performance.
First thing I noticed was that this camera / VTX combo delivers a far brighter and clearer image than any of the FPV systems I have reviewed before. That must be on account of the CCD camera, as opposed to CMOS sensor cameras that I have had so far. Second thing I noticed right away is that the RG-007 has a brighter and clearer image from the same video feed than the LS-800D. At the same time, the field of view of the RG-007 is smaller than the LS-800D. Funny thing is, that the right side of the picture is at the same spot, but only the left side of the picture is cropped. See the picture below. LS-800D is on the left, RG-007 on the right.

Overview of this "test setup" on our kitchen counter.

Now that I have the two "on the bench" I can also compare the latency of this FPV system with both goggles.
Here's a short (15 seconds) video demonstrating just that.
All in all, the screen of the RG-007 is more pleasant to look at, and the system is more responsive - except for in very low-light conditions. That's where the receiver starts to fail.
I think I will use this RG-007 as my primary goggles, and the LS-800D as secondary screen, if I have someone I would like to show what I see, and as DVR, of course. I will equip the RG-007 with a cloverleaf antenna, though.
All up weight (without battery) for this build comes in a little shy of 200 grams.

Conclusions
This nicely priced kit includes a video camera, transmitter, and goggles too! So it is aimed at first-time FPV pilots, like myself. Let's see how a target group member copes with assembling all these bits and bobs into a flying machine...

Let's start with the motors, because they are one of the major performance components. In this kit, you will find 4 Emax 1306, 4000KV RS series motors. Thay produce a little more torque than the 6000-7000 KV tiny motors that are out there, so they can handle three-bladed props with slightly higer pitch.

The props that come with the kit are 3035 three-bladed bull nose props with no particular brand on it. I ordered some Gemfan replacements for them, for when I crash (it's not IF, but WHEN ;) )

The ESCs are 10 DYS BLHeli S ESCs, capable of Dshot300 at least. Allthough they are labeled "oneshot 128", they were configured for DShot300 by default in the Flight Controller firmware.
The ESCs are rated 1S to 3S, and are therewith the liniting factor for as far as battery voltage goes. 3S is quite enough, so no worries there.

The Flightcontroller is an SP Racing F3 Flightcontroller, which is a bit of an outdated design nowadays, but it has all the features you need to control the quad. It is an "acro" version. So there are gyros and accellerometers, but no barometer on the board. The baro would be used for altitude hold, but that is not typically something you'd want in a freestyle / racer type quadcopter anyway.

There's a 5V, 3A BEC included, so you can power the camera, VTX, and the Flight controller with a regulated 5V power supply. Again 2S to 6S rated, so plenty of margin there.

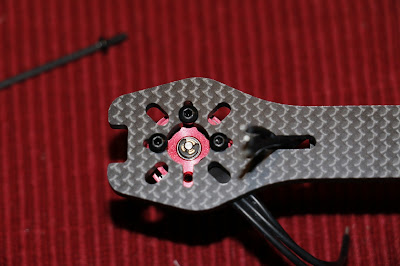
And then there is the frame. It's a pure X-shaped frame, and it comes with a small puzzle of carbon fiber platelets. Arms, and therewith the entide base, are 3mm thick, the other plates are 2mm thick, which should be enough for this size quad. The X feels nice and stiff.
The video transmission antenna is a proper Aomway circular polarised "clover leaf" antenna, wich should do well in the field.

The camera is an actual Runcam Swift. That's an 800 TV-lines CCD camera, with a 2.8mm lens attached to it. I am a little bit concerned about the view angle of a 2.8mm lens (I think it will be a bit narrow), but there are replacement lenses available with shorter focal lengths. So I will first see what this out-of-the box setup does.

In order to see the picture, Goggles are included in this kit. My first impression when I opened the box is that of a cheap pair of goggles, but let's not judge right away. It comes with a separate battery (nice that it is included!), and a charger for the battery.

The battery goes into a pouch at the rear of the headband, so it's weight does not count with the weight pushing on your nose. Which is a good thing, because these goggles are nicely light because of it! Not entirely sure about the "whip" antenna that comes with it, but again, let's not judge before I have even powered it on yet.

OK, time to unpack everything, and see how it all goes togeter.
First, I took out the major components, to see how they would fit together. There is no real assembly manual, but then agin, it all sort of follows the same pattern for ever build. There is some documentation on how to connect the Flight Controller - especially on which wires go where. So that is very helpful.

As for "the stack": the Power distribution board goes on the bottom position, held away from the (conductive!) carbon fibre frame palate by spacers. The flightcontroller goes on top of the PDB, followed by the base plate for the camera "pod" - all separated by spacers.

It looks like the frame was originally designed for bigger motors. There's plenty of space around the motors (which will act as protection in case of a vrash, so that's no problem), but the attachment screws are only just slotted into the arms. That means the screws have only minimal contact surface with the frame.

OK, time to mess with wires! :)

I will solder the motors directly on to the ESCs. Since they are BLHeli ESCs, there's no need for bullet connectors or such. If the direction of rotation is reversed to whet you want, you can corect that in the BLHeli software.

To de-solder the three wires from the ESCs, I cut the shrink-tube at the two edges, and folded it back on the soldering side. After cutting the motor wires to the correct length, stripping, and tinning them, they could be soldered on to the three pads on the ESC. A little new shrink-tube, and all is done, neat and tidy!

It takes a little careful reading and figuring out what goes where on the flight controller. In the end, I removed all not-used wires from their connectors. If you do that carefully, they can be placed back later, if you decide you need them after all (for a LED strip, maybe?)

The ESC power lines go to the power distribution board. I used two pads on the PDB to solder the 5V BEC on to. The 5V side of the BEC powers both the Flight Controller, as well as the VTX (and therewith the camera). The idea is that the BEC also serves as a filter to prevent noise from the ESC power lines to reac the VTX. We'll see how that works. If it is not good enough, I can always add a capacitor.

I stuck the BEC, together with the receiver, in between the PDB, and the flight controller. I soldered the angled header pins on the Flight Controller, and used the ESC connectors to connect the ESCs. Maybe I will solder the (shortened) wires directly to the board in the future, but for now, I will first try them out as such.

There was no room to put the VTX inside the camera pod, so I zip-tied it to the back. That way, the LCD screen is visible, and the push button for selecting Band / Channel / Power is reachable.

A bit of a bugger: the side plates of the top pod sit directly above the screws that hold down the pod's bottom plate (or the stack's top plate). Which means you cannot reach those screws with the side plates in place. That, in turn means that the camera will fall out from in between the side plates when you spread the side plates far enough to reach the screws. In short: you need to treat that plate as the top plate of the stack, and only then start assembling the pod.

So, the mechanical end electrotechnical build themselves proved to be pretty straight-forward. It was just about what you'd expect from an X-frame, motors, 4 ESCs, PDB / FC/ BEC stack, plus video pod.
Now, the software bit held a somewhat of a surprise...
There's no instructions as to what firmware is on the board, nor how to flash it. When I connected to BetaFlight, I got an error message, stating that this was not the correct firmware. It turned out to be Cleanflight, flashed on to the board. No worries, I have another CleanFlight drone, so I have Cleanflight installed somewhere too...
But then CleanFlight came back with the message that the firmware on the device was too old for this version of Cleanflight...

The CLI (Command Line Interface) told me that the Flight Controller was flashed with CleanFlight 1.11, dated late 2015! Obviously, this Flight Controller came from a pile of "left overs". Then again, SPRacing F3 Flight controllers were the way to go, state-of-the-art, only two years ago. What I mean to say is that it will fly with this firmware.

The firmware can be upgraded, of course. And nowadays, an SPRacing F3 with up-to-date CleanFlight is still a pretty decent setup. But for now, I wanted to see how it performs out-of-the-box. So no firmware flashing just yet! It did mean, however, that I had to install an earlier version of CleanFlight next to the version 2.1.0 I already had installed. Lucky for me, tha tis possible!
Final item in the kit is the FPV goggles. They are not branded, and are called RG-007 on the box. They come with a single whip antenna. Since I already have the LS-800D Goggles that can split into two parts, one of which can function as a standalone screen. So I thought I'd put the two next to each other, and compare performance.
First thing I noticed was that this camera / VTX combo delivers a far brighter and clearer image than any of the FPV systems I have reviewed before. That must be on account of the CCD camera, as opposed to CMOS sensor cameras that I have had so far. Second thing I noticed right away is that the RG-007 has a brighter and clearer image from the same video feed than the LS-800D. At the same time, the field of view of the RG-007 is smaller than the LS-800D. Funny thing is, that the right side of the picture is at the same spot, but only the left side of the picture is cropped. See the picture below. LS-800D is on the left, RG-007 on the right.

Overview of this "test setup" on our kitchen counter.

Now that I have the two "on the bench" I can also compare the latency of this FPV system with both goggles.
Here's a short (15 seconds) video demonstrating just that.
Also, the low-light performance differs between the two goggles:
(again, a short video; this time 36 seconds worth)
All in all, the screen of the RG-007 is more pleasant to look at, and the system is more responsive - except for in very low-light conditions. That's where the receiver starts to fail.
I think I will use this RG-007 as my primary goggles, and the LS-800D as secondary screen, if I have someone I would like to show what I see, and as DVR, of course. I will equip the RG-007 with a cloverleaf antenna, though.
All up weight (without battery) for this build comes in a little shy of 200 grams.

Conclusions
- Good looking build
- Build process is not too complex, and instructions are well enough
- Some components are better than expected for this price range. Notably the Runcam Swift camera is a good added value.Only the Flight Controller is a touch outdated
- Spinning the motors without props felt and sounded remarkably vibration free
- Surprisingly good pair of goggles. Nice, clear image, comfortably lightweight. No DVR, though.
How she flies? ... Wait for the next episode!
Meanwhile, the GearBest GB X155 Kit is, of course, available through GearBest.
========================================
EDIT
========================================
I flashed the firmware to CleanFlight 2.2.0, dated OCt 31, 2017, so that I could actually use CleanFlight Configurator 2.1.0 that I've been usung for my S500 upgrade project (work in progress, more on that later), and BLHeli configurator. This probably also allowed me to use the telemetry function of the FrSky receiver that came with the kit (XSR).
I now have audible RSSI and low voltage warnings from my Q X7S (again: more on htat transmitter later; guess I'll be busy for a while, eh?)
Comments
Post a Comment